Friday 22 April 2011

Quilt in progress.

After a few more days this week sewing, pinning, ironing seams, cutting more strips etc. I'm quite a bit further on the way to finish my first quilt. The top was all done. Went to the craft shop (twice) to get fabric for the binding (the lime-green), the backing (the brown) en the batting (the white (soft bits that goes in betweet the top and back)).
After my first visit to the craft shop, I came home with the wrong size batting. I had asked for 46' and meant square but didn't say. So when I put everything together it happened to be 46' long but at the maximum 42' wide..... That's wasn't enough.

So went back the next day and explained the mistake and came home with much thicker, but the right width batting. I could continue my project.

Then the basting was the next step to take. This means you pin the top, batting and back together with curved safety pins. You pin on lots of places to keep them lined up well, so you can turn it all over without the layers sliding apart.

Now I need to get some courage to actually start quilting. I LOVE the free motion quilting but think that's to much risk of faillure since I haven't done it before and it requires quite some practicing to get it right. So I'll start with straigt line quilting, tonight :-D.

Have a good Easter Weekend!!

Monday 18 April 2011

Above All Fabric - Spring Quilt Along

A few weeks ago my friend Jo made me aware of the Spring Quilt Along that was going to run at http://www.aboveallfabric.com/ . This was the change to make a proper quilt with the help of a proffesional! Jo & I made our first quilt blocks a few months ago when Quilts-for-Queensland was on. The idea was to make 12inch quilt blocks, send them to a lady who would collect them and with the help of very experienced quilters make them into quilts. Those quilts are being hand out to people who lost their belongings in the Queensland floodings. What's nicer to get, when you've lost lots or even everything, than something specially handmade for you. So after a few blocks each, we were bitten by the quilt-bug. :-) You can see the Quilt Along on here: www.aboveallfabric.com/blog/?page_id=4542

This is 1 of her examples to get you going! Everybody can quilt along, you can upload photo's of your quilt on Flickr but don't need to if you don't want to (but then you won;t be able to win 1 of her $30 vouchers!).


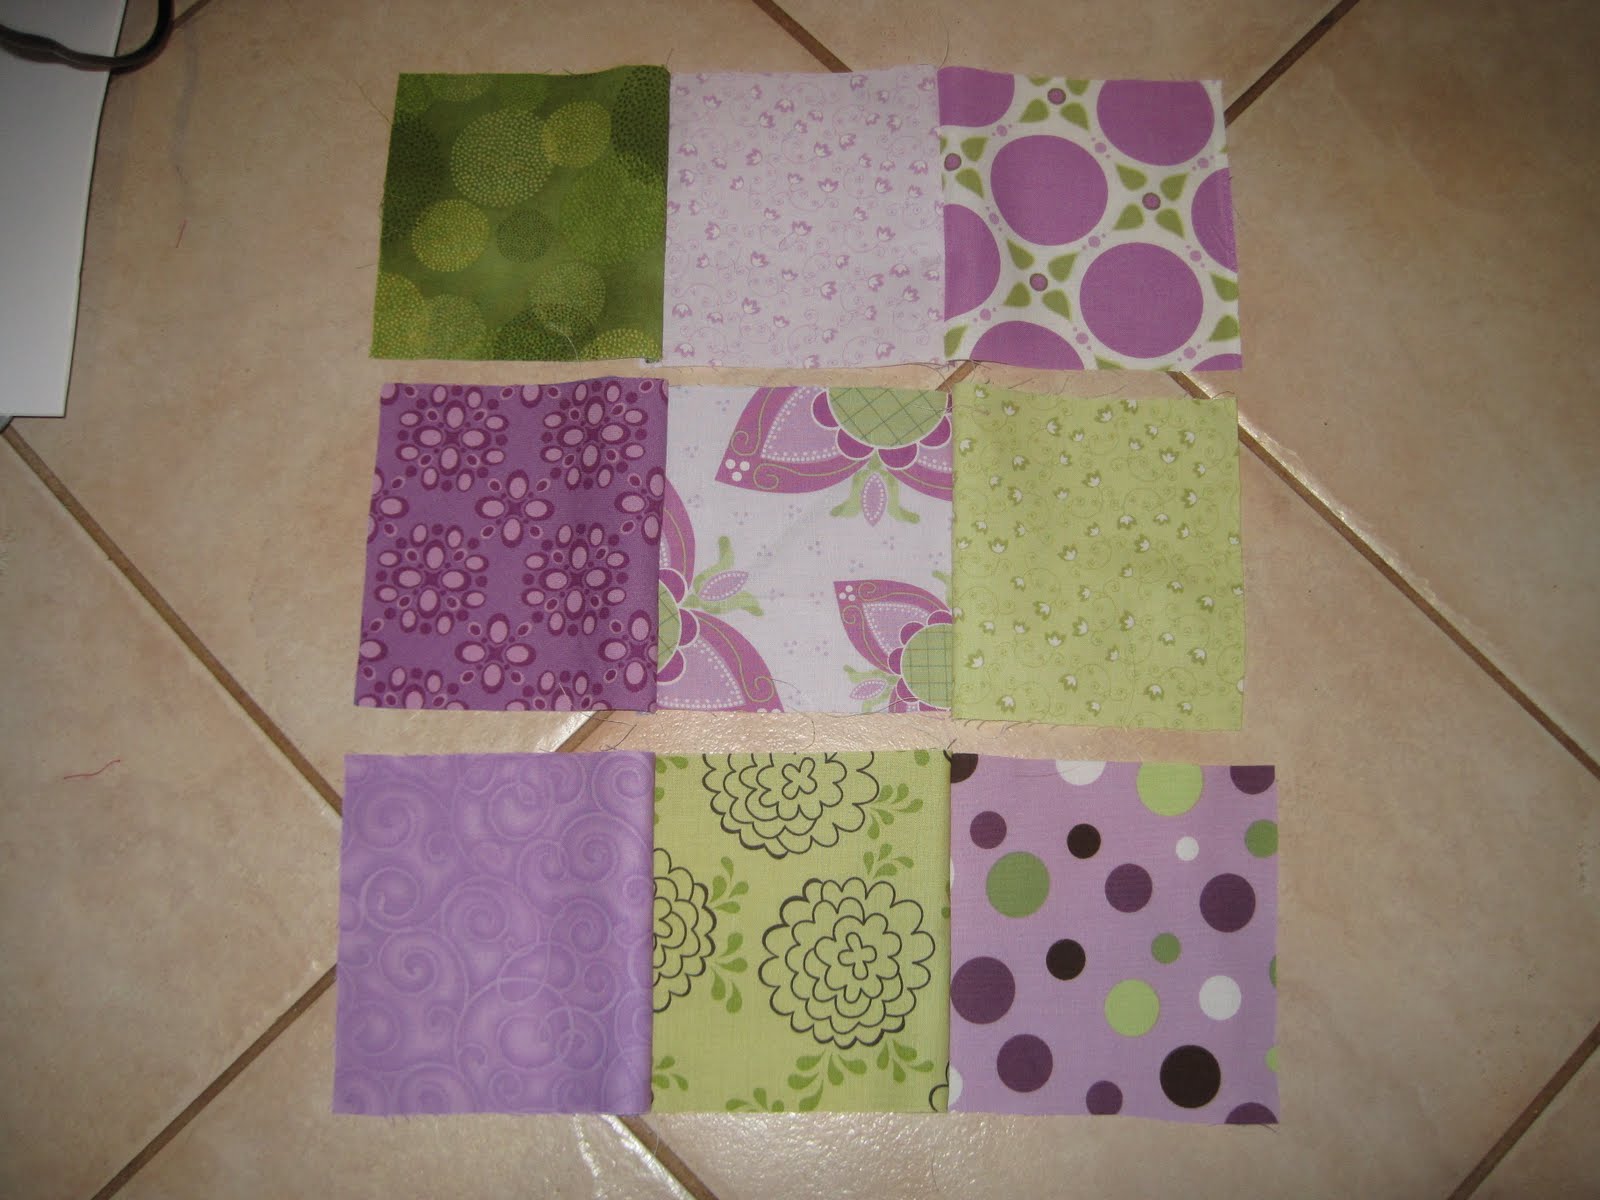
First I just wanted to use my stash but allthough I've quite a bit, not enough different & still matching ones. So I had to go to the local craftshop and buy some more fabrics :-D. This is what I came up with.

The pattern says to cut 36 5 inch squares and lay them in 4 blocks of 9.

Then you sew them together row by row, block by block.


The next step is to sew the sashing in between. That's the fabric that goes between and around the blocks.


The border is what's following then. And all of this is, step by step, on the Above All Fabric Blog.

For some reason this last photo went on it's side, but you can see it all came together quite nice.

Wednesday she's going to explain to put on the batting (the soft bits in between the fabric on the front and back), the backing and quilting. Can't wait! Do have to have another visit to the craftshop for fabric for back & binding (the final edge to smooth the sides). How unfortunate ;-)!

Sunday 17 April 2011

Sending a little Happy.

2 Weeks ago I made this card for my mum & dad. I couldn't upload it on this blog sooner, because I had to wait for her to receive it in the mail. :-).No fun in getting a card you've already seen on the blog, is it? Since I live quite rural in Australia it takes a while for my card to travel to the Netherlands. I used this 'Get Sketchy' sketch and wanted to use red & white. I found this beautiful red&white Stampin' Up ribbon in my stash that was just perfect. I've put 2 strips of ribbon together to make it wider. Then used a great stampset from Unitiy.
The sentiment on the inside is from a Unity stamp from the same set and says: Sending a little happy. I stitched the rectangle and raised the hot-air balloon with dimensionals.

Have a good weekend!

Tuesday 12 April 2011

Rag Quilt for my little princess.

One evening blogging around I found a lovely set of 5 fabrics, ready to be made into a small quilt. I thought my daughter would love these fabrics as well. So the idea was born. I ordered 3 sets of the small quilt fabrics and decided I would make it into 1 single-bed quilt for the little princess in our lives. I found 2 other fabrics from the same range (Quite Contrary by Riley Blake) in a different online fabric shop to add more variaty. Then I noticed it wasn't as easy done as said to have the different fabrics randomly ordered. Every time I thought they looked pretty random, there seemed to be some sort of pattern one way or the other. So much for random! ;-) But after a few attempts this is the order/pattern I came up with.
A rag quilt is different then a normal quilt. You sew the squares cross-ways on the backing, then sew the squares together with the wrong sides facing, so you end up with the seams popping up on the good side. The white you see in the seams, is the white flannel backing.
After you've sewn a few rows of squares, you snip the seams with a good pair of (springloaded) scissors every 1/2 or 1/4 inch (1/2-1cm). The smaller the distance between the snip the more ragged your quilt will be.
You can see I've snipped 3 of the 4 seams showing on the photo. After a few washes they'll become more and more ragged & fluffy. Normally you have the rags along the edges as well but I do prefer a proper binding. So I went on the internet again and luckely some shops still sell fabrics from this range. Think I will use the white variaty of the bottom left or top left corner fabric in the photo above. All fabrics are (or have been) available in white, green, pink or red as basic colour. Mmmmmm, decisions, decisions....

And all this when the little princess is asleep to keep it a surprise :-D.

Thursday 7 April 2011

Cardmaking Technique class with Annette

Yesterday I went to a cardmaking class by Annette. She's teaching all kinds of different techniques this term. This week the new technique was 'emerging colours'. We made 2 cards, using different tones of green (kiwi kiss, certainly celery, old olive). I really like this technique. It's quite easy but very effective. With the card on the left, we had to stamp the background stamp in black first. Then we stamped the big flower with Versamark and heat embossed them with clear embossing powder. The next step was to 'sponge' over the embossed flowers with green ink in a circulair movement. Then rub the embossed flowers with some paper towel to get the ink off and let them really stand out. The last stap was to cut out some little flowers stamped on some scrap paper and stick them on with a black pearl in the centre.
The card on the right was done quite similar but still different (my dad would love this sentence ;-) ). As you can see in the photo below there are different shapes to be seen within the white flower.
So first you randomly stamp a little flower and some branches in 2 shades of green on a piece of white cardstock. Then you stamp a few bigger flowers in Versamark on top of this and heat emboss them with clear embossing powder. The next step is to get a brayer, cover it in a third shade of green and roll it over the cardstock. Make sure you roll well so you don't get stripes. Again clean the embossed flowers with paper towel and you're done! Easy peasy isn't it?

The stampset we used is Stampin' Up's Vintage Vogue. Thanks Annette!

Monday 4 April 2011

An other new house.

My friend Jo recently bought a house so I wanted to make her a card. I went blogging and found inspiration in the Colour Q colour challenge. And the current sketch challenge from Papertake Weekly.
I saw Pals Paper Art has a challenge to use punches and that was exactly my plan so I c0uld incorporate this one as well. In Spotlight I bought a brick-a-brick punch which is perfect for the 'new house' theme I wanted to create. I had a little play with the papers, discovered a suitable digi stamp and had a go. I went on Micrisoft Publisher to get the right oval shape around my digi and added the sentiment. (I hadn't done that before so was quite proud to get that done without a big struggle). Because of the requested colours I liked to add some left over hessian (jute), layered with the pink ribbon & buttons, I am quite happy with the outcome.
There's even some stitching but because of the white thread it's hard to see on the photo, so have a look at the photo underneath where I zoomed in.
Hope you like it! Have a great week.

Saturday 2 April 2011

A card to share.

Last Monday we returned home after a 4 weeks holiday. We had a lovely time and I was able to go shopping at Spotlight TWICE!!!! :-D. Among lots of others thing, I bought this beautiful pattern paper. I really like the blue-brown combination and they're all double sided. Working through the pile of mail that was waiting for us, there was a card from a friend. She was moving houses. I just had to use my new papers. Recently I bought Stampin' Up's Pendant Park stamp set in one of the sales. Hadn't really used it yet. I love the little bench with the squirrels, so I thought instead of the predictable house on the card, I'd use this bench. I looked at some old Mojo Monday sketches and picked 1 where I could use several pattern papers. And this is how it turned out!
When it was finished, I'd preferred it when I had clear embossed the bench but the card was all done by then. Have to keep that in mind for another time then ;-).
I've put this card in 4 challenges: www.pileitonchallenge.blogspot.com (romantic & Fancy) www.frosteddesigns.blogspot.com (use bling) www.iftheshoefitsscrapit.blogspot.com (sewing) www.littlemissmuffetchallenges.blogspot.com (stitching) Have a nice weekend!